Add a simple form
Description
A simple tutorial introducing the basics of Plone development.
In this tutorial we add a simple form.
There are many ways to add a form to Plone. In this tutorial, we use z3c.form.
There are two steps to building a simple z3c.form form; registering the form in configure.zcml, and writing the Python code to handle the form.
Register the form
To register our form, we need to add an entry in configure.zcml.
-
Edit the configure.zcml file in the browser directory. Open configure.zcml in your editor and add this just before the closing </configure> tag.:
<browser:page
    name="hello_world_form"
    for="*"
    permission="zope2.View"
    class=".hello_world_form.HelloWorldFormView"
    />
Note
- We use the name attribute to access the form.
- The for attribute allows us to limit context to a particular interface. With the asterisk, we are not limiting access.
- The permission attribute allows us to limit access with a permission. In this case, we have a wide open permission.
- The class attribute points to our Python class. Here, we have a HelloWorldFormView class in a file named hello_world_form.py.
Our entry uses the browser prefix, so we need to define it in configure.zcml before we can use it.
-
Add xmlns:browser="http://namespaces.zope.org/browser" at the top of configure.zcml so it looks something like:
<configure
    xmlns="http://namespaces.zope.org/zope"
    xmlns:browser="http://namespaces.zope.org/browser"
    i18n_domain="example.helloworld">
When we are done, configure.zcml should look something like this.:
<configure
    xmlns="http://namespaces.zope.org/zope"
    xmlns:browser="http://namespaces.zope.org/browser"
    i18n_domain="example.helloworld">

<include package="plone.app.contentmenu" />

<!-- -*- extra stuff goes here -*- -->

<browser:page
    name="hello_world_form"
    for="*"
    permission="zope2.View"
    class=".hello_world_form.HelloWorldFormView"
    />

</configure>
Python code
Now we need to create the code to handle our form.
-
create the file hello_world_form.py in the browser directory.:
touch hello_world_form.py
Open the hello_world_form.py file in your editor and add the following code.
-
Define our form field in an interface.
The imports:
from zope.interface import Interface
from zope.schema import TextLine
from zope.i18nmessageid import MessageFactory
_ = MessageFactory('hello_world')
The interface:
class IHelloWorldForm(Interface):

    hello_world_name = TextLine(
        title=_(u'Name'),
        description=_(u'Please enter your name.'),
        required=False)
This defines a TextLine field with an id of hello_world_name. The title and description will show up on the form. It is not a required field.
-
Create a class for our logic. This is used when our view is accessed.
The imports:
from Products.statusmessages.interfaces import IStatusMessage
from z3c.form import button
from z3c.form import form, field
The class:
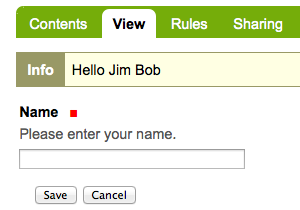
class HelloWorldForm(form.Form):

    fields = field.Fields(IHelloWorldForm)
    ignoreContext = True

    def updateWidgets(self):
        super(HelloWorldForm, self).updateWidgets()

    @button.buttonAndHandler(u'Save')
    def handleSave(self, action):
        data, errors = self.extractData()
        if errors:
            return False

        if data['hello_world_name'] is not None:
            hello_name = data['hello_world_name']
        else:
            hello_name = 'World'

        IStatusMessage(self.request).addStatusMessage(
            "Hello %s" % hello_name,
            'info')
        redirect_url = "%s/@@hello_world_form" % self.context.absolute_url()
        self.request.response.redirect(redirect_url)

    @button.buttonAndHandler(u'Cancel')
    def handleCancel(self, action):
        IStatusMessage(self.request).addStatusMessage(
            "Hello No One",
            'info')
        redirect_url = "%s/@@hello_world_form" % self.context.absolute_url()
        self.request.response.redirect(redirect_url)
Note
- We first import the field from our interface above.
- The ignoreContext directive means this form is not meant to be called in the context of an object.
- We define updateWidgets to the same method belonging to our parent.
- We create 2 button handlers.
The fun parts here are the two button handlers; handleSave and handleCancel.
-
At the bottom of hello_world_form.py we need to use wrap_form on our class. This wraps our form in the standard Plone layout, placing our form in the content area. This also creates the view HelloWorldFormView referenced in configure.zcml.:
from plone.z3cform.layout import wrap_form
HelloWorldFormView = wrap_form(HelloWorldForm)
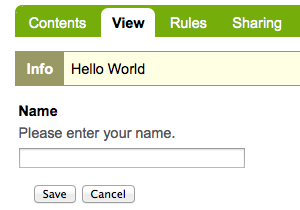
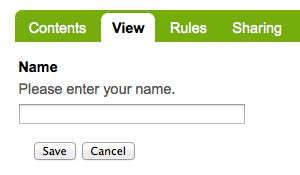
Access the form
You can access the form with an url like:
http://localhost:8080/Plone/@@hello_world_form
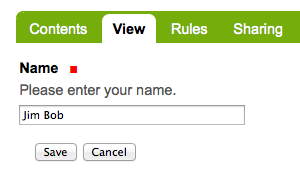
Type in a name and click Save, or just click Cancel.