
Using Kupu as visual editor
Kupu is a platform independent web based Javascript HTML WYSIWYG editor. What this means is that it will let you create HTML content on your web site.
From Plone 4 on, TinyMCE is the default visual editor for new sites. However, Kupu is still available to use if you prefer so. Check the Setting Your Preferences section to learn how to set Kupu as your default editor.
A typical Kupu toolbar looks like this:

kupu-grab
The text format is normally left with the HTML setting, but some sites offer structured text or other markup languages for editing pages.
The icons are:
- bold,
- italics,
- left align,
- center,
- right align,
- numbered list,
- bulleted list,
- dictionary list,
- tab left (block),
- tab right (block),
- image (the "tree" icon),
- internal link (the "chain link" icon; make a link to another page in the given site),
- external link (the "world" icon; make a link to a web page elsewhere),
- anchor (the "anchor" icon; make a link to a specific section of a web page),
- table (add a table with rows and columns),
- direct HTML editing (the "HTML" icon; if you know HTML, edit the HTML for the page directly), and a
- pulldown menu for text styling.
Images
Place your cursor within the text of a page, then click the "tree" icon. This panel will pop up:
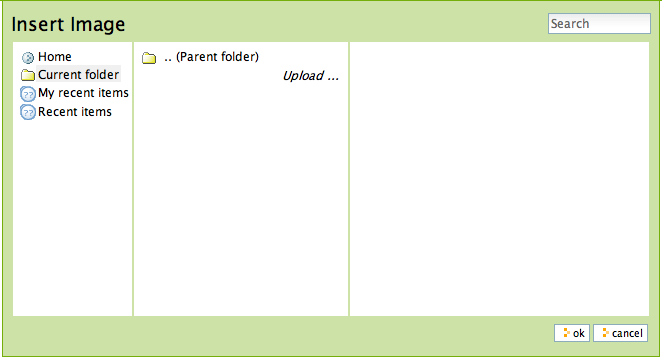
Click "Current folder" in the left side of the panel, if it isn't already highlighted. The current folder is the folder that contains the page you are editing -- all pages are contained inside some folder. There are many ways to manage storage of images, including having one central images folder, but a common method is to store images that show on a page in the folder that contains the page (the current folder). In this method, pages and the images associated with them are stored together within the folder structure. If you click the Upload button, you will be prompted to select an image on your computer and upload it. After selecting an image to upload, the right panel will let you give the image a title for use on the web site, and several image placement and sizing options. Clicking OK will upload the image and place it on the page. The same panel will appear if you click an image on page to select it, then click the same "tree" icon for editing the image options or for changing the image. You are responsible for sizing and editing images on your computer before you upload them, but one easy way to handle images for use on most web pages is to make a copy of an image on your computer, then resize it to something like 1000 pixels in largest dimension. This is a reasonable size for uploading -- there is no need to upload your gargantuan images coming from your digital camera. Plone will automatically create several sizes of an uploaded image, including "large," "mini," and other sizes. You pick the size you want to use when your upload or edit the image with the "tree" icon. You can also override the image size choice by editing the HTML.
Internal Links
Select a word or phrase, click the internal link icon, and the insert link panel will appear:
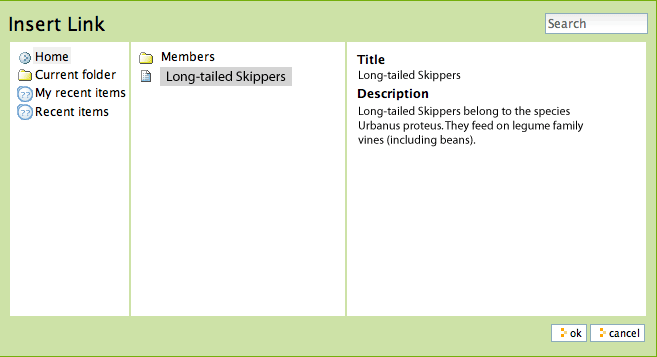
You use this panel by clicking on Home or Current folder to begin navigating the Plone web site to find a folder, page, or image to which you wish to make a link. In the example above, a page named "Long-tailed Skippers" has been chosen for the link. After this panel is closed, a link to the "Long-tailed Skippers" page will be set for the word or phrase selected for the link.
External Links
Select a word or phrase, click the external link icon, and the External link panel will appear:
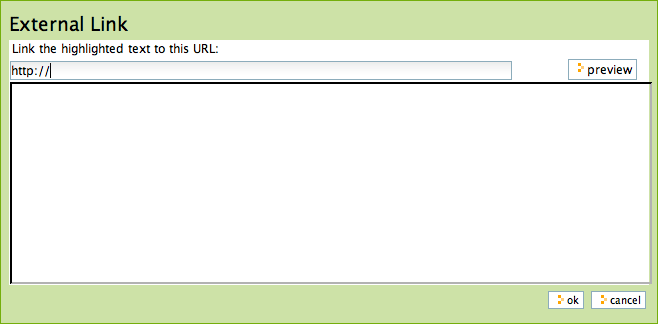
Type the web address of the external website in the box starting with http://. You can click preview if you need to check the address. If you paste in the web address, make sure you don't have duplicate http:// at the beginning of the address. Then click ok. The external link will be set to the word or phrase you selected.
Anchors
Anchors are like position markers within a document, based on headings, subheadings, or another style set within the document. As an example, for a page called "Eastern Tiger Swallowtail," with subheadings entitled "Description," "Habitat," "Behavior," "Conservation Status," and "Literature," an easy set of links to these subheadings (to the positions within the document at those subheadings) can be created using anchors.
First, create the document with the subheadings set within it, and re-type the subheadings at the top of the document:
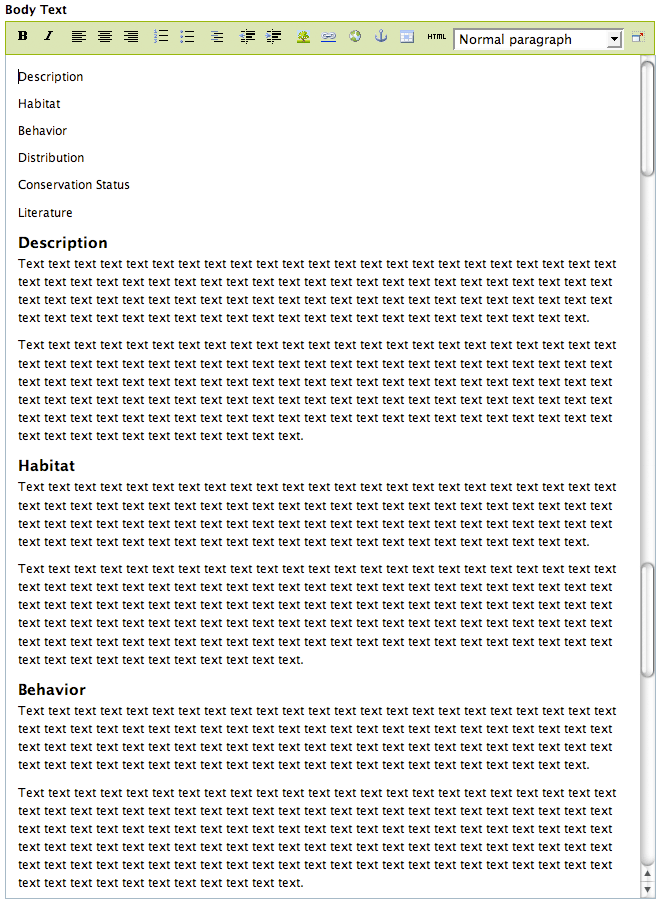
Then select each of the re-typed subheadings at the top and click the anchor icon to select by subheadings:

A panel will appear for selecting which subheading to which the anchor link should connect:
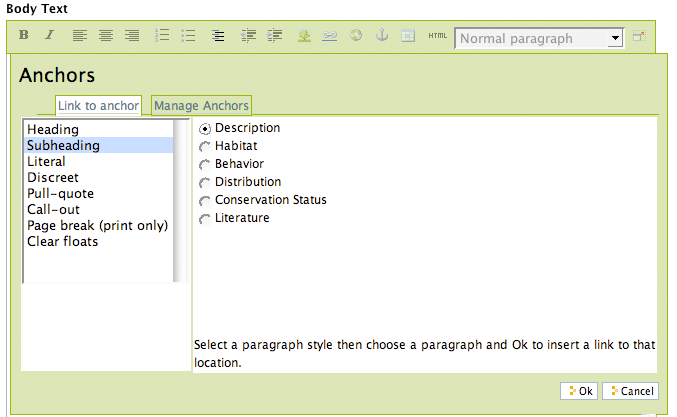
The Link to anchor tab will appear. The left side shows a list of styles that could be set within the document. For this example, the subheadings are used for each section, which is the usual case, so subheadings has been selected. The right side of the panel shows the subheadings that have been set within the document. Here the Description subheading is chosen for the link (for the word Description, typed at the top of the document).
You can be creative with this powerful feature, by weaving such links-to-anchors within narrative text, by setting anchors to other styles within the document, and coming up with clever mixes. This functionality is especially important for large documents.
Tables
Tables are handy for tabular data and lists. To add a table, put your cursor where you want it and click the add table icon. You'll see the add table panel:
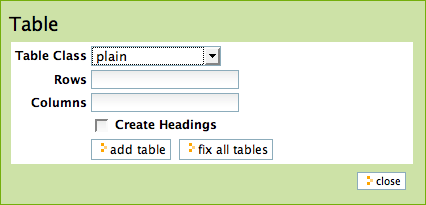
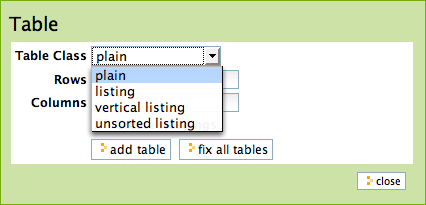
Setting rows and columns is straightforward. If you check the Create Headings box you'll have a place to type column headings for the table. Table class refers to how you want the table to be styled. You have choices such as these:
Here are examples of these table styles:
plain:
| Thoroughbred Champions | Quarter Horse Champions |
|---|---|
| Man O' War | First Down Dash |
| Secretariat | Dashing Folly |
| Citation | Special Leader |
| Kelso | Gold Coast Express |
| Count Fleet | Easy Jet |
listing:
Thoroughbred Champions

|
Quarter Horse Champions

|
|---|---|
| Man O' War | First Down Dash |
| Secretariat | Dashing Folly |
| Citation | Special Leader |
| Kelso | Gold Coast Express |
| Count Fleet | Easy Jet |
After the table has been created you can click in a cell to show table resizing handles and row and column add/delete icons:

In the table above, the cursor has been placed in the "Special Leader" cell, which activates little square handles around the edges for resizing the entire table. It also activates add/delete icons for the current cell, the "Special Leader" cell. Clicking the little x in the circle will delete the entire row or column that contains the current cell. Clicking the little arrowhead icons will add a row above or below, or a column to the left or right of the current cell.
Text Styling
The text style setting is made with a pulldown menu. Here are the choices:
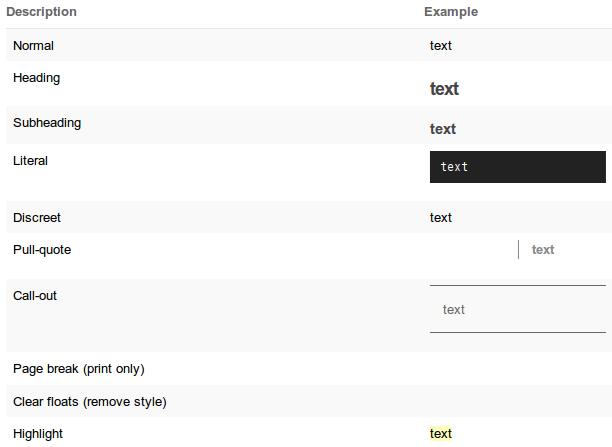
As with normal word-processing editing, select a word, phrase, or paragraph with your mouse, then choose one of the style choices from the pulldown menu and you will see the change immediately.
Saving
Click the Save button at the very bottom and your changes will be committed for the page.
Footnotes
Markup languages
If you are the sort of person who likes to enter text using so-called mark-up formats, you may switch off the visual editor under your personal preferences, which will replace Kupu with a simplified text entry panel. The mark-up formats available in Plone are:
Each of these works by the embedding of special formatting codes within text. For example, with structured text formatting, surrounding a word or phrase by double asterisks will make that word or phrase bold, as in **This text would be bold.** These mark-up formats are worth learning for speed of input if you do a lot of page creation, or if you are adept at such slightly more technical approaches to entering text. Some people prefer such formats not just for speed itself, but for fluidity of expression.